Sunday, October 28, 2012

Counterfeit Kit Challenge 3: Two Cards

The third challenge of the month for the Counterfeit Kit Challenge is to make two cards (masculine and feminine versions of the same card).

CKC highlighted this sketch (Unscripted Sketches #169) earlier this month, and I decided to use it for my take on the challenge:

Unscripted Sketched #169

I used two card bases from my stash, along with these two polaroid shapes to make the two cards look similar. Everything else was from my kit.
I really didn't have much to call "masculine" in my kit, so I looked to a scrap of wood plank paper to use as the background and embellishment. I knew I wanted to use stars for the 3 boxes on the sketch, but couldn't find anything in my kit or stash that worked here. After staring at the page for far too long, it finally occurred to me, duh, I could just hand cut some stars. I get so focused on punches and diecut machines that I don't always remember that a piece of paper and some scissors is really all I need.

The red paper had a sheen to it, so I used Staz-On ink for the stamp. The colors didn't come out great in my photo, but the stamp actually turned out really nice on this satin-like paper, and I was glad to have a use for one of the....well, let's not put a number on it.....MANY $1 stamps I've accumulated. 
The feminine card uses the last bit of a long-saved piece of Cosmo Cricket paper. The "hey sugar" was from the title strip of the paper.

Now what? Well, you could:

  • Check the Counterfeit Kit page today for links to other Master Forger projects.
  • Be a Master Forger! There's still time to apply! Click here for all the details.
  • Take the challenge and link your projects here.
Enjoy the end of your own weekend!

Friday, October 26, 2012

Finally Friday!

Happy Friday!

It's going to be a long weekend at our house, but anywhere is better than work for a couple of days, right?

Junior's Rally competition is Saturday and Sunday.  Practice has been limited these past few weeks, so it's a bit like taking a test without studying.  You know you won't do as well as if you had studied, but if you can just pass it you'll be happy :).

We will move to our first Level 2 trials, which means OFF LEASH courses. I had a nervous stomach pang just writing that sentence. It's a big move in this world of dog stuff.  I vow to keep a good attitude about it as it's happening, though - even if we don't qualify, it will be good experience for any "next time" we might decide to try.

My only other goal for the weekend is to have Crystal get to watch us in the ring. Poor Crystal hasn't been able to watch a single trial, because Junior spends his whole time trying to find her in the crowd if she's there.  He doesn't get distracted if she's not in the venue, so she has to leave.  This time we're going to find a way for her to watch, even if that means setting up a video camera or dressing her up as a potted plant.

Remind me of all this pep-talk when I come back on Monday and complain about how tired I am!

But today I'm thinking of more relaxed times and showing the rest of my completed Finger Lakes vacation pages. It was fun to relive vacation for a few days this week!  I am not done with the week's pages, but this is the end of my work so far.  I used my October Counterfeit Kit for these pages, too.

Our rental house is a bed and breakfast during the off season, so there was a lot of furniture on the porch. That made it a great hangout spot for reading, spontaneous wine and nosh plates and the occasional nap.

Everything came from my kit except the title letters.
I decided to journal right on the pictures on this page. I just wanted to put all the pictures of the house on this two page layout so I could tell that story all at once.  And I am in love with MME Enamel Dots. Such a simple little embellishment, but the pack I purchased worked perfectly with the colors in my kit papers this month.  I went through the whole pack.
Since I posted all these vacation pages out of order, I loaded them all into Flickr here. If you'd like to see them in order, that's the place to do it.  I will keep adding pages until I'm done with the whole week's stories.

Have a great weekend!

Thursday, October 25, 2012

Thursday Tried and True Pin: A 1-Page Sketch

My tried-and-true pin for this week is a sketch.  It was perfect for some pictures from our vacation, another page using my Counterfeit Kit.


This sketch came from Scrap That Baby. I was surprised to see the content of that blog (all about scrapping kids under 4-years old), since the 3 pictures I had used for my page were actually baby pictures, too.  That might not be quite as much of a coincidence if you usually do kid pages, but I rarely have pictures or stories of babies. Just a happy coincidence, I guess.

And here's my page. Sorry for the white box faces - need to keep baby private, since he's not mine :). We took this vacation with my friends from college, and baby is the newest, cutest addition to the group. We just haven't had a lot of kids within our group, so the baby was passed around and squeezed and cuddled quite a bit.


Finally used the stars and buttons from my September kit, along with some other Jillibean circles and letters.  The woodgrain paper is from my kit, and the other Simple Stories and Jillibean papers are scraps from previous kit months. I inked the edges of the circles with red, yellow and blue inks but then topped those colors with a brown ink so they weren't so bright.  The red dots are Want2Scrap, and I've been using them like Frank's Red Hot Sauce lately.
So, another Pinterest success story for me! Want to follow?
Follow Me on Pinterest

Wednesday, October 24, 2012

More Kit Pages - Summer Vacation Pages

I mentioned yesterday that there may be some new eyes here in the audience. So in case any of you haven't heard, the Counterfeit Kit Challenge Blog is looking for new Master Forgers

If you're interested in learning more, click here to see the announcement.  It is a lot of fun, and I'm looking forward to the inspiration that comes when new people, new projects and new ideas are added to the team!

Today I have more pages made with this month's Counterfeit Kit.  These are all from our summer trip to the Finger Lakes in New York:

I mentioned yesterday that I ran out of paper for my kit this month.  So I added in some scraps from previous kits to do this quick page. I made the "hit the road" tag with an unuse stamp I have had forever. Glad I thought to finally use it!
The end of my one sheet of paper that inspired my kit this month - that striped paper is an older American Crafts paper, and I love how it has so many colors I wouldn't normally tie together.  That allowed me to get away with pink buttons, red hearts, yellow/green enamel dots and turquoise cardstock. I think :). It's a real hodge podge of colors, not my usual style, but I loved this picture (I know it doesn't look like much here - I cut out a friends face and it looks pretty dark, but the actual picture is much nicer), and didn't need much journaling.
Another page that didn't need much journaling. Used some scraps from my kit for the flags and added in the Amy Tangerine stuff like I mentioned yesterday. When I was done with the page, I didn't like all that wide-open black space on the page. Since it was a Coordinations cardstock with a pink core, I decided I should let some pink show through. So I scored random lines around the page from the back and then lightly sanded the lines to let the pink appear.  It's easier to see the pink in person. I liked that it just sort of filled the space without having to add more papers or embellishments.
That's it for today.  I have several more pages to show this week, so stay tuned!

Tuesday, October 23, 2012

October Counterfeit Kit Challenge #2

First, I'd like to welcome any new readers and followers!  We had a 2Peas thread last week for people looking for new blogs to follow, and I posted a link to this blog.  And then I didn't update for 5 days - oops!  That's not very inviting, is it? But I found some other great blogs to follow and still need to go back to the thread and check out a few more. 

Yesterday I did not post my Challenge #2 (to take a photo of a project in a new or unique way) with the rest of the Master Forgers, because my entry is a bit of a stretch for the guidelines.  Rather than taking a picture, I scanned several pages to post this week. 
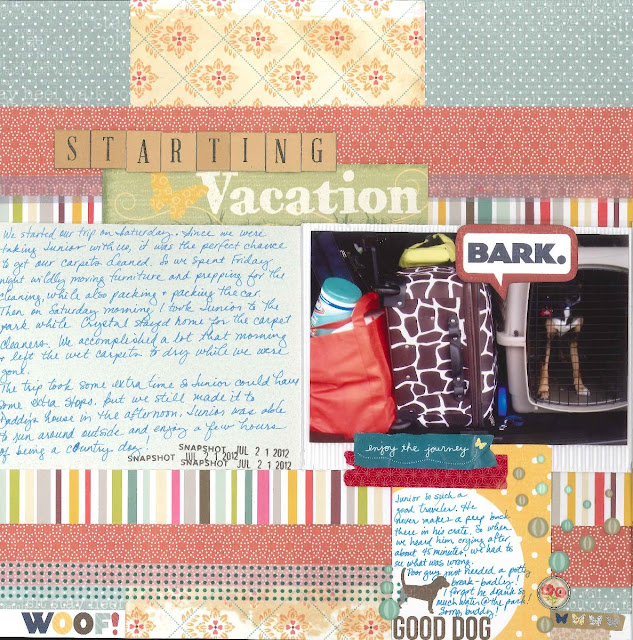
 
Does anyone remember my "Romney the dog" comment?  This is the picture that sparked that little family joke.  Junior's crate was wedged pretty tightly into the car for our summer vacation. He barely fit and was nearly relegated to the roof (no we would never really do that). We are not - I should say CRYSTAL is not - what could be called "light packers."

                          
I posted these two pages earlier this month.  Just wanted to show the scanned-version.

It's not a new or unique idea to scan pages, but I haven't done it for awhile. I do not claim to be a great photographer, but the time of year really gets in the way of taking layout photos at all.  The summer is firmly planted in the past around here, which means I now leave for work in the dark, and soon it will be completely dark by the time I get home, too.  That doesn't leave many options for nice, bright project pictures.  So I thought it might be a good time to talk about how I scan projects to get better page pictures on the blog.

Last year I read this article about using Paint to stitch scans together.  I do not have any fancy software to stitch scans or edit photos, so the Paint option was right up my alley.  Paint is a free program that comes on most desktop computers, which met my minimal-technology capabilities.  I used the instructions in the article, combined with some trial and error for the version on my own computers, and ended up with a method that works well for me.  In case it helps anyone else, here's what I do:

  • I scan my layouts on a copier and can scan up to 11x17. If you only have access to 8 1/2 x 11, that's fine, you'll just need to scan your page in more sections in order to get it all on the glass.  With 11x17, I am able to do just 2 scans and stitch in one place.
  • Consult your own scanner's instructions to determine how to access your scans.  In my case, my scans are sent to my email as a pdf.  I open that pdf, save as, change the file type to jpeg, and then save.  I then end up with each page saved as its own jpeg image.
  • I open the first image to work with.  I have a general order I use for editing. 
    (1) I flip/rotate the image as needed.
    (2) Then I select Stretch/Skew and reduce the image by 50%. That step may not be necessary for you; When I do this process on my laptop, that version of Paint allows me to View, Zoom, and then select a smaller size like 25% to view my whole mat.  My work computer doesn't give me that option, so I have to reduce the image size in order to easily work with the image.  It also makes the image a manageable size to upload to my blog and other sites.
    (3) I select (ctrl+A) the full image and then move it as needed to remove space from the left and top of the image I want to keep. Once it's in a good place, then
    (4) I make sure there is some white mat space below and to the right of my image, so when I paste the second scan onto this image, it will have some space on the mat.
    (5) Now I save the image but leave it open. 
    (6) And then open my second scan. Usually I'm just trying to use this piece to obtain the bottom inch or two of my page, but I look for a good place to make that cut - maybe the top of an element or something with a line that helps me mask the stitch location.
    (7) Repeat steps 1-3 with the second scanned image.  Then I either select all (ctrl+A) or use the select tool and grab the piece I want, and copy the selection.
    (8) Go back to the original image and paste the second image.
    (9) Drag the image into place so it blends with your first image. Once you have it in place, click elsewhere on the mat to set your new image. (Note: Don't click off of the image until you are happy with its placement. If you do it by accident, go to the menu and click Edit, Undo, and try to paste again).
    (10) Go to the leftover white mat space on the right and bottom of your image and reduce it.  If you don't do this step, the white space will be saved with your image.
    (11) Save your new image!
    (12) Sometimes I stitch a two-page layout into one image. In that case, I just repeat the process until I'm happy with the final image.
I know it's not fancy, but it works for me! And now that I have the hang of it, it really only takes a couple of extra minutes while I'm putting a post together.  I won't use it all the time, but it's a good option to have for the next few, very dark months to come. 

One last page for today.  My kit for October is running on fumes, with just enough for our Challenge #3 later this month.  I had to add in some paper and looked for more options with pink.  I happened to find the Michael's Recollections brand of an Amy Tangerine line when it was on clearance for $5. I decided to pick it up just for the vellum and cut-outs included in the stack, but the paper ended up being perfect to mix with some of my kit for some additional vacation pages like this one:
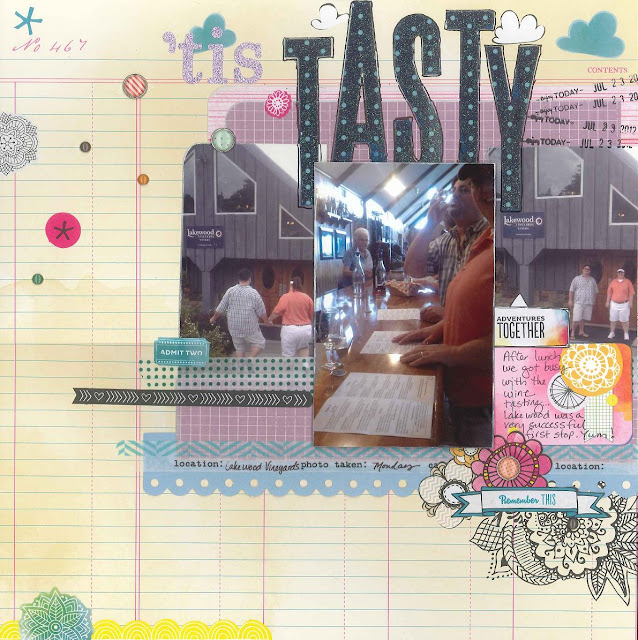
See where I stitched it? About half way down the page. I should have just stitched the bottom couple of inches to avoid the dark spot, but I was in a hurry and didn't notice how dark that section was.  I'll live with it :).
I'll pick up the pace around here and be back every day this week with more pages for this month.  Thanks for visiting!

Thursday, October 18, 2012

Thursday - Tried and True Pins

This post has nothing to do with scrapbooking, so if you're a usual scrapbooking reader, I'm giving fair warning to turn back now!

I have discovered a couple of truths about me right now:

1 - Follow Me on Pinterest  I spend lots of time on Pinterest but rarely follow through on all the pin-ably good ideas I find there.
2 - I never meant for my blog to be all about one topic and planned to include "life, home and fun in the suburbs."  My life, home and fun are usually all wrapped up in scrapbooking, but there are definitely more things going on around here!
3 - "What do you want for dinner" is among the most anxiety-inducing, arguement-starting, avoidance-worthy question of most any day at our house. We have fallen deep into the pit of meal lethargy which leads to eating out all. the. time.  And not good eating out - I mean fast, drive-thru, I'll-pay-for-this-later kind of eating out. Yuck.

In case you can relate to any of those issues, I'm passing along three pins that are now tried and true and have helped me this week.

I went through my Recipies to Try board and tried two recipies that have been hits for us:

Meatball Sub Casserole from thecountrycook.net
Chicken Cordon Bleu Casserole from Six Sisters' Stuff

Lest you think we only eat casseroles, I have to say we hardly EVER eat casseroles.  Crystal is not usually a fan of the casserole.  But times are desperate, and I needed to find something different.  She got up after dinner and served herself an extra spoonful of the chicken (right off of the serving spatula in the pan), so I knew that one was a winner.

These dinners also gave us lots of leftovers for lunches, which made the time and effort worth it to me.

And the third pin is just a tip, but it worked just like it said it would:
(Picture from simplyhealthyfam.blogspot.com) My thoughts:  I can't believe how easy this cooking tip was. It's one of those "why didn't I ever think of this idea on my own" kind of ideas.  But I went from cooked  to shredded and cooled within 45 minutes (including boiling the water).  And I have oodles of chicken for meals now and in the freezer.  That's my kind of cooking :).
Hope one of those pins helps someone else! I'm on Pinterest here if you'd like to follow along.  Leave a comment with your Pinterest address if you would like another follower, too!
Follow Me on Pinterest

Tuesday, October 16, 2012

More Dogs

When I was trying to title this post, I was reminded of this video. It has nothing to do with anything except that it makes me laugh:


And I need to laugh, because what else is there to do when bad things happen?

This weekend I watched our dog, Junior - the star of so many of my pages - have a seizure.  It was scary, and the treatment news from our emergency vet was sort of a shock.  We were there once before, about 6 months ago, for what I thought might have been a seizure (we thought maybe he had just fallen off the bed and was scared or injured, but now I'm sure that was a seizure, too). 

We talked to our usual vet (who was Junior's foster mom and who has been fantastic as a vet!) over the weekend and will do more with her this week.  But walking out the door to come to work this morning was hard. I'm worried that this seizure activity may have happened when we weren't home, too, and we've never known it.  I've been with him pretty much every minute for the past 3 weeks and to have this happen right as I'm coming back to work is really unsettling.

So while we wait, I'm just thinking about my puppy......and that made me think of posting these pages about him.....


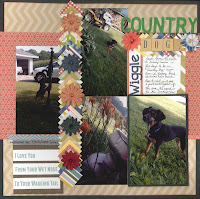
I was at my LSS for a crop last month, and all the Christmas paper was on clearance.  I picked up several sheets for no particular reason, and it sat on my table while I tried to get to work on some pages for my Counterfeit Kit.  But my eye kept getting drawn to the new stuff, and first one piece moved to my project, then another, then a sticker, and finally I decided not to fight it, and I just moved my kit aside and starting playing with the new stuff :).  So here I used all Christmas papers (mostly B-sides) in a completely non-Christmas layout.


Our next competition is in two weeks. We have not been training over the past few weeks, so I'm just hoping we can qualify a few runs and have a good time.  Really, what else matters but some quality time with that cute face?

By the way, if you're interested, we are doing Rally. If you're looking for some bonding time and obedience training with your dog, it's a great way to do it!

Monday, October 15, 2012

October Counterfeit Kit Challenge #1: Quilt Inspiration

Hi Everyone!

Today is my first day back to work. Bleh!  I really turned a corner last week and feel quite a lot better now, and I've been a productive little scrapper over the past few days.  But now it's back to reality, and again I say, bleh!

Before I get to the challenge, I want to make sure everyone sees that the Counterfeit Kit Challenge is looking for new Master Forgers!  In case you didn't see the post, check here for all the details.  When the announcement for new team members was posted, I was reminded of how I felt when I joined the group last year.  It has definitely lived up to the excitement, and I can't wait to see some new faces in the group soon!

OK.  So onto business.  Today we're showing our Counterfeit Kit projects for Challenge #1 - to let quilts inspire a page. 

I recently noticed this paper from Basic Grey Clippings and used it as inspiration for my project.
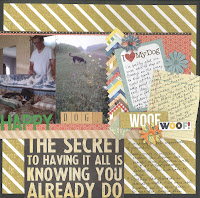
Here is my project. I cut 1" squares from all the papers in my kit and used them to make some simple square-pattern
borders throughout my pages.  I used a long chain on the left, a short chain behind the title, and another piece
behind the journaling on the second page. 

I also used this red paper from my kit. It has been in my stash for a long time, and I not
quilt-like circular pattern to it, so I was glad to use it for this challenge.

The colorful "Woof" came from the paper title strip. It was too cute to not put to use :). The kraft stripe is another paper title strip put to good use.  The large quote card is hiding a big hole in that sheet of paper.  I didn't have a plan as I put this page together, so sometimes I had to improvise and find ways to make it all come together. 


If you complete a project of your own, be sure to add it to the October Mr. Linky at the Counterfeit Kit blog.  Have a great week!

Saturday, October 13, 2012

Special Master Forger Hop: Morph Challenge

I'm very excited to finally be able to show our special Morph Challenge! 


We started this project a few months ago, and since I was at the beginning of the chain, it feels like it has been such a long time since we started the challenge!  But it really went through the groups pretty quickly, and today if you start from the Counterfeit Kit Challenge Blog, you can see what happens when scrappers meet a good ol' game of Telephone.

Our project started with Crystal's page. If you didn't come from Crystal's blog, go back and start here to see her page.

And here is my page, thanks to Crystal's inspiration!


I looked at Crystal's page and saw a couple of sections. So I sort of flipped it and started with those sections and built my photos into those clusters.

When I did this page, I realized I don't use much black in my scrapbooking,
because I basically used all my black papers and accents on this one project.

I've had that car diecut frame forever and finally found a reason to use it.  Circles became the repeating pattern on this
page, between paper patterns, circle journaling spots, round embellishments, and even some Stickles on the round
headlights on this car diecut.

I used DIY Thickers for the work "Happy," and used green flock to mimic the green carpet of the show floor. 

Such a fun project!  The next stop on the morph is Susanne.  Go see how she took my page and morphed it into her own great project.  And if you hit a road block along the way, you can find the full morph list back at the Counterfeit Kit Challenge Blog.

Have a great weekend!

Saturday, October 6, 2012

Something Old and Something New......

And something black, something blue.....In my October Counterfeit Kit.

Those four points came together in my kit, which I am naming Soothing Moments.

If you're hopping through the Master Forger kit posts:  
You came from: Milissa http://millermall.blogspot.com/
You are here: Rebecca http://howiburb.blogspot.com/
I had part of my thyroid removed last week, and I'm trying to get back to normal. I really thought I'd feel good by now, but I really don't, and I'm kind of cranky about it. So I indulged in some retail therapy last week to make myself feel better, with an eye on embellishments I don't usually pick because they're too expensive. I didn't go too crazy, but I ended up with some things I really want to use soon. Without realizing it, several pieces like the Thickers tiles and the Pebbles masking tape stickers are nearly identical to the inspiration kit items. So i thought, what the heck and dumped them into my own kit.

Those new things are layered onto some older papers, with lots of blues like the inspiration kit. The whole thing really started with that colorful stripe, which like the sheet in the original kit, has so many colors that it should be pretty versatile. Some of my papers have been seen before; I did manage to do a good scrap room clean up last weekend and de-kitted all my prior Counterfeit Kits, so all those items went back to the stash and were once again up for grabs.

Oh, and I forgot to mention the inspiration kit. It's Gossamer Blue's September kit. Check out Gossamer's kits because they are new and fresh and completely full of beautiful goodies! I just went there to grab a page link and got distracted by an October add-on kit. Maybe I should ride the shopping high just a bit longer?!

I'm hoping to feel focused and alert enough to play and enjoy some Soothing Moments this weekend. I'm DETERMINED to make it happen! We will see what my body has to say about that plan.


If you want to come up with your own kit and projects, remember to add a link to the Mr Linky page so we can visit and see your creations. And leave a note in the comments to tell me about a soothing moment - something you're going to do for yourself this week. You deserve it!