First, I'd like to welcome any new readers and followers! We had
a 2Peas thread last week for people looking for new blogs to follow, and I posted a link to this blog. And then I didn't update for 5 days - oops! That's not very inviting, is it? But I found some other great blogs to follow and still need to go back to the thread and check out a few more.
Yesterday I did not post my Challenge #2 (to take a photo of a project in a new or unique way) with the rest of the Master Forgers, because my entry is a bit of a stretch for the guidelines. Rather than taking a picture, I scanned several pages to post this week.
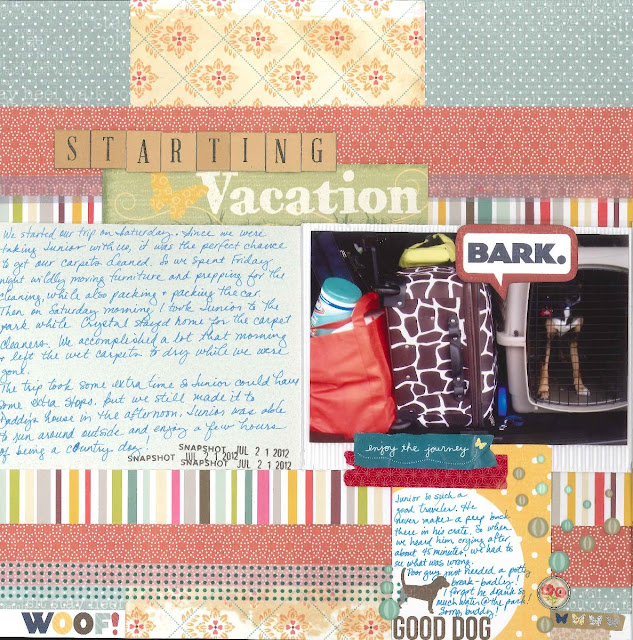 |
| Does anyone remember my "Romney the dog" comment? This is the picture that sparked that little family joke. Junior's crate was wedged pretty tightly into the car for our summer vacation. He barely fit and was nearly relegated to the roof (no we would never really do that). We are not - I should say CRYSTAL is not - what could be called "light packers." |
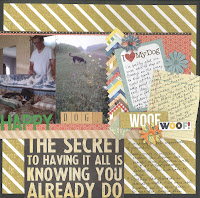
I posted these two pages earlier this month. Just wanted to show the scanned-version.
It's not a new or unique idea to scan pages, but I haven't done it for awhile. I do not claim to be a great photographer, but the time of year really gets in the way of taking layout photos at all. The summer is firmly planted in the past around here, which means I now leave for work in the dark, and soon it will be completely dark by the time I get home, too. That doesn't leave many options for nice, bright project pictures. So I thought it might be a good time to talk about how I scan projects to get better page pictures on the blog.
Last year I read
this article about using Paint to stitch scans together. I do not have any fancy software to stitch scans or edit photos, so the Paint option was right up my alley. Paint is a free program that comes on most desktop computers, which met my minimal-technology capabilities. I used the instructions in the article, combined with some trial and error for the version on my own computers, and ended up with a method that works well for me. In case it helps anyone else, here's what I do:
- I scan my layouts on a copier and can scan up to 11x17. If you only have access to 8 1/2 x 11, that's fine, you'll just need to scan your page in more sections in order to get it all on the glass. With 11x17, I am able to do just 2 scans and stitch in one place.
- Consult your own scanner's instructions to determine how to access your scans. In my case, my scans are sent to my email as a pdf. I open that pdf, save as, change the file type to jpeg, and then save. I then end up with each page saved as its own jpeg image.
- I open the first image to work with. I have a general order I use for editing.
(1) I flip/rotate the image as needed.
(2) Then I select Stretch/Skew and reduce the image by 50%. That step may not be necessary for you; When I do this process on my laptop, that version of Paint allows me to View, Zoom, and then select a smaller size like 25% to view my whole mat. My work computer doesn't give me that option, so I have to reduce the image size in order to easily work with the image. It also makes the image a manageable size to upload to my blog and other sites.
(3) I select (ctrl+A) the full image and then move it as needed to remove space from the left and top of the image I want to keep. Once it's in a good place, then
(4) I make sure there is some white mat space below and to the right of my image, so when I paste the second scan onto this image, it will have some space on the mat.
(5) Now I save the image but leave it open.
(6) And then open my second scan. Usually I'm just trying to use this piece to obtain the bottom inch or two of my page, but I look for a good place to make that cut - maybe the top of an element or something with a line that helps me mask the stitch location.
(7) Repeat steps 1-3 with the second scanned image. Then I either select all (ctrl+A) or use the select tool and grab the piece I want, and copy the selection.
(8) Go back to the original image and paste the second image.
(9) Drag the image into place so it blends with your first image. Once you have it in place, click elsewhere on the mat to set your new image. (Note: Don't click off of the image until you are happy with its placement. If you do it by accident, go to the menu and click Edit, Undo, and try to paste again).
(10) Go to the leftover white mat space on the right and bottom of your image and reduce it. If you don't do this step, the white space will be saved with your image.
(11) Save your new image!
(12) Sometimes I stitch a two-page layout into one image. In that case, I just repeat the process until I'm happy with the final image.
I know it's not fancy, but it works for me! And now that I have the hang of it, it really only takes a couple of extra minutes while I'm putting a post together. I won't use it all the time, but it's a good option to have for the next few, very dark months to come.
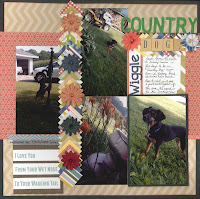
One last page for today. My kit for October is running on fumes, with just enough for our Challenge #3 later this month. I had to add in some paper and looked for more options with pink. I happened to find the Michael's Recollections brand of an Amy Tangerine line when it was on clearance for $5. I decided to pick it up just for the vellum and cut-outs included in the stack, but the paper ended up being perfect to mix with some of my kit for some additional vacation pages like this one:
 |
| See where I stitched it? About half way down the page. I should have just stitched the bottom couple of inches to avoid the dark spot, but I was in a hurry and didn't notice how dark that section was. I'll live with it :). |
I'll pick up the pace around here and be back every day this week with more pages for this month. Thanks for visiting!


